Thursday, April 21, 2011

Alphabet Coloring Book - page 1


I drew a series of alphabetical/alliterative coloring pages for my niece last Christmas. I'm thinking about revamping some of them and trying to put them together into a coloring book. What do you think? Good idea? Boring? Not enough to color? Too focused on learning/letters? I'll keep posting the pages as I finish them.

Wednesday, April 20, 2011

Chicken Curry 1 - my first try is a success!


It was only a couple years ago that I discovered that I absolutely love curry. It doesn't have to be really spicy--although I do enjoy a bit of spice. I just love the full, sweet flavor. But (surprise!) I've actually never cooked with curry before a couple days ago. I was looking through this small Thai cookbook that I have, browsing all the different curry recipes. This meal is very loosely based off of one of them, and though it's not authentic Thai cuisine, it did turn out delicious. (Paul said that it was like being at a restaurant!)

Obviously, I cook for two, so this recipe is adjusted for two people (plus leftovers that Paul can take to lunch.)

For the curry: (while this was cooking, I put on a pot of rice. I made 6 cups, but I think 4 would have been plenty.)

2 chicken breasts, cut into cubes
2 small onions
about 6 oz of mushrooms (fresh produce)
a handful of fresh chives
handful of fresh cilantro
3/4 cup coconut milk
1 tbs curry powder
3-4 cloves of fresh garlic
1 (4 oz) can green chilies
1/2 tsp chili powder

The cooking goes in about 3 different stages. The first is just browning the chicken for a bit. For this, I put some vegetable oil in a deep sided skillet (use a wok if you have one) and melted about a tablespoon of peanut butter in the oil. Once it was starting to bubble, I tossed in the chicken and let it brown for 3-4 minutes. Then use a slotted spoon to take the chicken out and put it aside for a little bit.

The next stage is dicing the garlic and onions and sauteing them in the oil. After they start getting soft and fragrant, add the mushrooms.

Once these cook together for a couple minutes, add the chicken back in. Then add a half a can (3/4 cup) of coconut milk, 1 tablespoon of curry powder, the can of green chilies, and 1/2 teaspoon of chili powder. After this cooks together for a few minutes, add a handful of chopped chives and a handful of chopped cilantro (be generous!)

As I often do, I just let this sit on the stove for a bit to let all the flavors mix. But it would be ready to serve any time after you add the chives and cilantro. (The chives will soften nicely if you let them cook for a few minutes.)

Monday, April 18, 2011

Creamy Potato Bacon Soup with Basil


This is a great staple that I like to make for dinner, and then use leftovers for lunches. The nice thing about this soup is that you can make it thick and almost stew-like, or really runny and soupy. (I prefer thicker.) It's also really easy to make large or small batches of it, depending on how much you have of certain key ingredients. If I'm feeling really energetic, I'll make some bread-bowls to go with it, but regular rolls, toast, or crackers also work well.

Here's the basic recipe:

1-2 lbs potatoes, any kind. (You can use leftover baked potato.)
2 large onions
5-10 pieces of bacon, cooked and chopped
milk (whole milk is best. Most recipes will call for cream, but I like to use milk because it's less fatty but still give the creamy texture.)
basil
salt
flour

1) Put your soup pot on the stove over medium-high heat and put a little oil or butter in the bottom. (I like to use bacon grease, which I save and keep in the fridge.) Dice the onion (and 2-3 cloves of garlic, if you want) and saute them in the pot.

2) Once the onions are soft, add about 1/2 cup of white flour. (This is to thicken the soup.) Stir it around until all the flour is moistened, then quickly add a little water so the onion/flour mixture doesn't start to burn.

3) Chop up the potatoes and toss them in, adding enough water to cover them by a couple inches. If you're using a full pound of potatoes, I'd recommend adding 6-8 cups of water. If they are leftover baked potatoes, then you just need to wait until the water boils. If they're raw, you'll need to let the water boil for a while, until the potatoes are cooked.

4) While the water is heating up, add 3 tablespoons of sweet basil (I know this seems like a lot, but it's worth it!) and salt to taste. You'll probably want at least 2 teaspoons. I usually add a little while the potatoes are boiling, and then later, when it's almost done, I taste it and add some more if it needs it.

5) After the potatoes are soft, turn the temperature down to medium, and add the milk and the bacon. (I said 5-10 pieces because you can put in a little or a lot depending on how much you like bacon.) However many cups of water you added, add half as much milk. So, if you added 8 cups of water, add 4 cups of milk. Again, you can use whatever kind of milk you want, but whole milk will give you the creamiest taste without actually using cream.

6) At this point, I like to let the pot just sit on the stove for a while, letting all the flavors mix. If it's getting close to serving time, it's ready to serve, but it's ideal to have half and hour to an hour to just let the pot sit on the stove. Just make sure that you don't boil the soup after you add the milk.

Let me know if you have any questions or points that need clarification!

Wednesday, April 13, 2011

Potato Cakes with Rosemary and Garlic Salt


When your main-staple potato dishes become a little dull, here's a fun way to try something new. These potato cakes are fairly easy to make (especially if you have some kind of blender or food processor. I made these last night as a variation on what a friend made for me years ago. They turned out great. 

Chop up 4-5 red potatoes in a blender or food processor. Add  1 tsp of rosemary, 1/2 tsp of garlic salt, a dash of milk (probably 2 tablespoons), and about 3 tablespoons of flour.

Heat up some olive oil in a frying pan, and cook them like pancakes, turning them over when they start to get a little crispy on the bottom. (I think the crispy part is the best.) Each cake may take several minutes, so it might be a good idea to try using multiple pans, or a long pancake griddle if you have one.

Tuesday, April 12, 2011

Washington DC in the Spring: 2011 edition

 
Cherry tree blossoms over a picnicking father and daughter nearby the Jefferson Memorial

 A beautiful street in Southeast DC -- D St SE, I believe (near 3rd)

"The Hiker" -- a monument I love but know nothing about. This is on Memorial Bridge between Lee's House in Arlington Cemetery and the Lincoln Memorial

There are beautiful fields of daffodils planted between the highways, but they're accessible to industrious pedestrians (like me!)  

 The trees are starting to turn green around the WWII memorial. Each pillar represents a state or territory in the US, and there are two tall pillars--one for the Pacific and one for the Atlantic theaters of battles.

 This is Rosslyn, near where we live. Very city-a-fied.
 
 This is the Founding Fathers Memorial, a special island to one side of the National Mall. It's beautiful! I love weeping willows, they always make me thing of the penguin/tea scene in Mary Poppins.

Sleeping ducks are the cutest!

 
This is the little-known Women's Vietnam Memorial, dedicated to the women that served in the military and Red Cross during the war. 
 
 I don't think I'll ever be able to come here without thinking of the movie, Mr Smith Goes to Washington. I love that there is some guy just chilling out in the sun. It's odd to me. Perhaps it's because this monument is one of the closest to where we live, or perhaps it's because of the architecture, or maybe because it always seems to be a lazy summer day whenever I'm here. But this is probably the "homey-ist" monument for me.

 The Smithsonian Castle was the original Smithsonian, housing all the displays that people donated... becoming the first building of "America's Attic."

Fun on the Mall behind the Capitol


The Japanese Magnolia trees (that we often call Tulip Trees) sprung out early, while we still had several weeks of 40 degree weather (for which I was immensely grateful!) 


Even on a chilly, cloudy day, the cherry trees make it seem like summertime!
 Spring is a beautiful time to go explore the National Cathedral, and enjoy picnicking or lounging in the beautiful parks and lawns surrounding it.

Monday, April 11, 2011

Eggnog Scones


I created these a couple days ago when I went to make apple scones and discovered I had no apples. But once again, necessity has proven to be the mother of invention, and these "egg nog" (ish) scones appeared! Despite the fact that these scones, in fact, do not have any egg in them; they certainly have a mild egg nog flavor. They were a tad bit messy to make, but they have an incredible texture. I think they're absolutely delightful.

Oven: 425 degrees.

The first step is to mix all the dry things together in your main mixing bowl:
2 cups of flour (you'll be adding more flour later)
1/2 cup sugar
3 teaspoons of baking powder
1 teaspoon of baking soda
1/2 teaspoon of salt

Then, cut in 1/2 cup of butter till it looks like it's forming little clumps with the flour mixture.

Add 3/4 cup of milk and 1/4 cup of spiced rum. (woohoo!) Mix with a spoon.

Add another 1-2 cups of flour. The goal is that it should be thick, but also moist enough that it's very sticky if you stick your hand in it. Once it seems to fit this description, powder a surface heavily with flour and turn the dough (which might correctly be described as "goop") onto the surface. Fold it over in halves, alternating directions, and pushing down after each fold. (And you can add some more flour to the top if it still seems to sticky--it will get worked in as you fold.)

When it no longer seems sticky to push down on the top, cut the dough into scone-sized wedges and put them (separated) on a buttered baking sheet. Bake them for 10-15 minutes, taking them out as soon as they start to look a little golden on the top.

Saturday, April 9, 2011

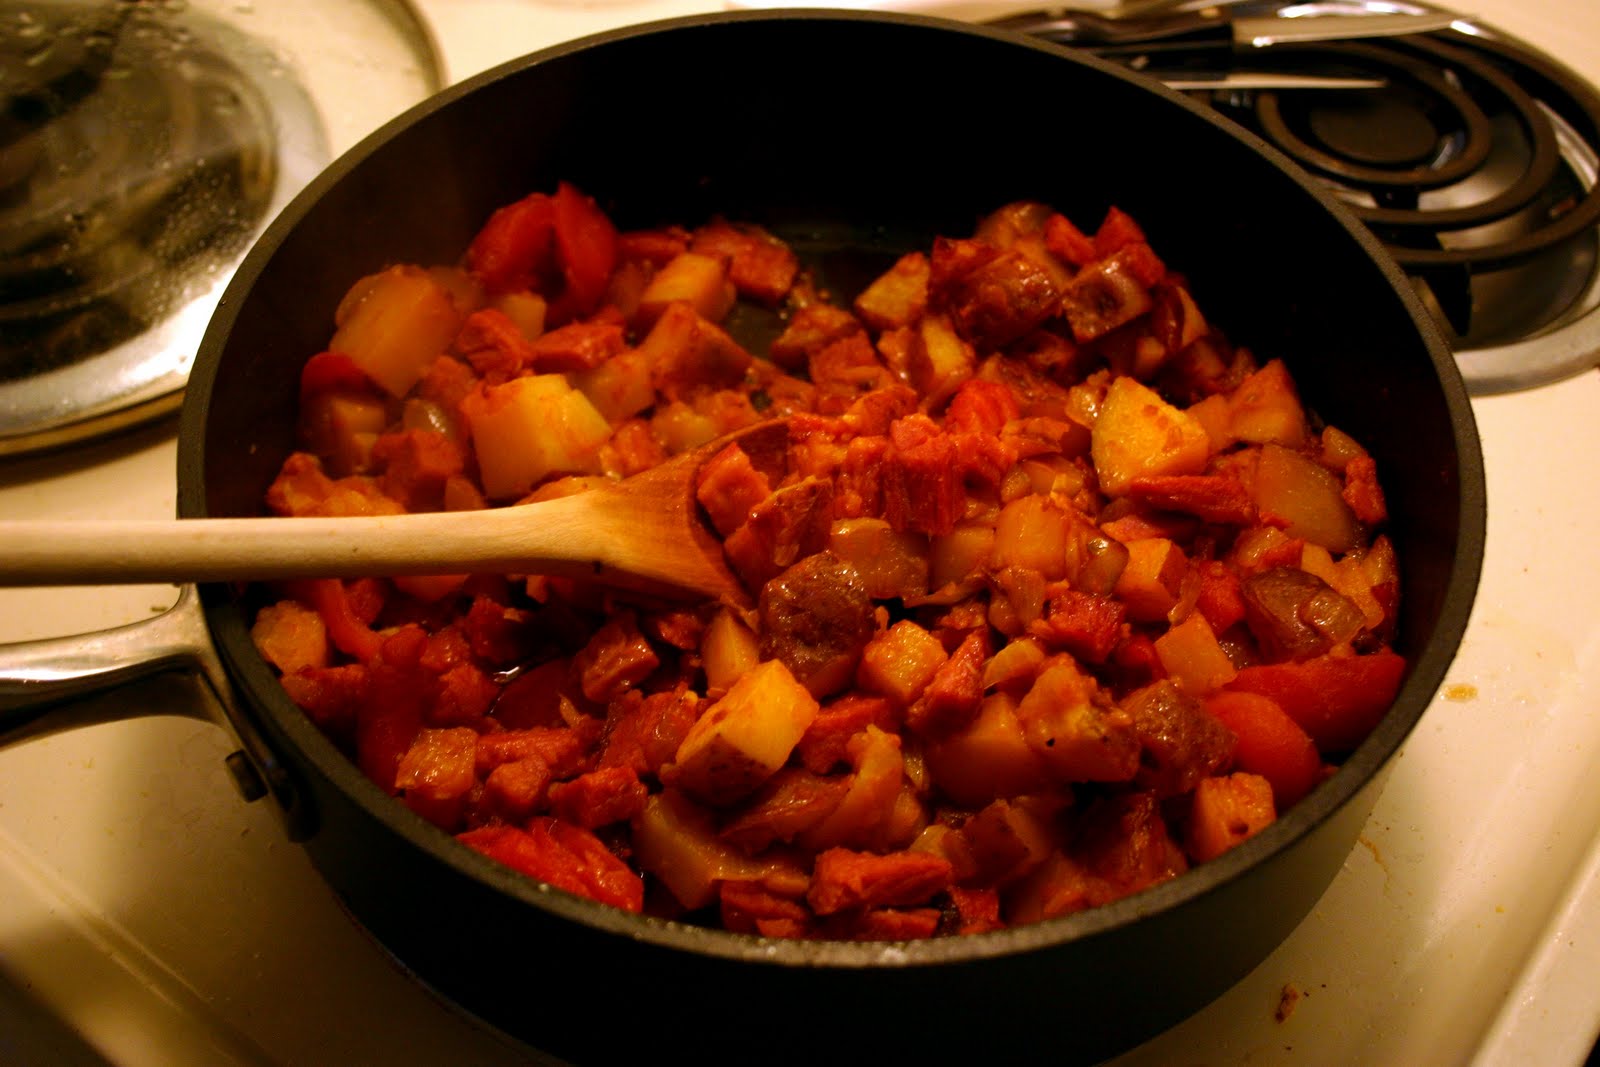
Corned Beef Hash

I made this last night for an easy dinner, and it turned out amazing. Seriously, if you have some left over corned beef, you've got to try this! (Yay for St. Patty's Day sales!)

This is probably good for 3 people, so you can adjust more or less of things depending on how many you're trying to serve. Here's what you'll need:

fresh garlic
onion
red potatoes
tomatoes (canned or fresh)
corned beef
a little cooking oil

For starters, I peeled about 9 cloves of garlic. I know that sounds like a lot, but as they simmer in the oil, they get soft and sweet. Once the cloves are peeled, dice them and put them in a large skillet with a large dollup (3-4 tbs) of oil. Dice one or two onions and throw it in with the garlic. Leave the skillet uncovered and just let them simmer together for a while, until they become really fragrant (maybe 5 minutes.)

Next, dice two large red potatoes and add them to the skillet along with some diced tomatoes. I actually used a can of "Mexican stewed tomatoes" because I didn't have any fresh tomatoes, and this turned out great. So if you're using fresh tomatoes, I'd recommend adding a little bit of cumin and chili powder and maybe some red pepper--and maybe a little water (1/4 cup or so). The canned tomatoes would have a bit more liquid in them than the fresh ones. Let these simmer together, covered, about 10-15 minutes, until the potatoes are pretty soft. Stir it occasionally, but don't worry if it starts to look a little on the dry side, the meat will add some liquid.

Chop/shred the amount of corned beef that you want to add, and add that to the skillet. Let it all simmer together another 5-7 minutes, stirring occasionally... and then enjoy!